Week 6 — Incident Management with ServiceNow
This week, we focused on Incident Management using ServiceNow, an essential process in IT Service Management (ITSM) that ensures services are restored as quickly as possible in the event of an incident. The goal is to minimize the impact of incidents on the business and provide efficient solutions through role-based workflows.
Overview of Incident Management
Incident Management is a critical ITIL process aimed at restoring normal service operations as quickly as possible following an unexpected disruption. The primary objective is to minimize the impact on business operations while ensuring that incidents are resolved effectively.
Key Steps in Incident Management:
- Incident Detection: Identifying incidents through monitoring systems or end-user reports.
- Incident Logging: Recording all relevant incident details in a service management platform.
- Incident Diagnosis: Understanding the root cause and determining whether a resolution is possible at the first level or if escalation is required.
- Incident Resolution: Fixing the issue or providing a workaround.
- Incident Closure: Confirming resolution with the user and closing the incident in the system.
Incident Management helps to reduce service downtime and improve the overall user experience by addressing incidents in a structured and timely manner.
Overview of ServiceNow
ServiceNow is a cloud-based IT Service Management (ITSM) platform designed to streamline and automate various IT processes, including Incident Management. It allows organizations to manage their IT services, incidents, problems, and changes through a centralized interface.
Key Features of ServiceNow for Incident Management:
- Role-Based Access: ServiceNow supports role-based workflows, which allow users, agents, and managers to interact with the system based on their specific responsibilities.
- Incident Lifecycle Management: ServiceNow provides tools to manage the entire incident lifecycle, from detection and logging to resolution and closure.
- Dashboards and Reporting: Managers can track performance metrics, SLAs, and ongoing incidents through customizable dashboards.
- Automation: ServiceNow automates repetitive tasks, like ticket assignment and escalation, ensuring faster response times.
ServiceNow’s capabilities help organizations streamline their incident management process, improve response times, and enhance service reliability.
LAB 03 — Incident Management Simulation
We created a scenario in ServiceNow where each role was involved in a real-time incident management cycle. Below are the key tasks performed:
Step 1: Request Your Personal Developer Instance (PDI)
- Go to developer.servicenow.com.
- Sign up or log in with your developer account.
- Navigate to Instance → Request Instance.
- Choose the latest release (Yokohama recommended).
- Wait until your PDI URL is ready (format: https://devXXXXX.service-now.com).
- Note your admin username and password (emailed to you).
Step 2: Create Three Users
- Log into your PDI with your admin credentials.
- In the Application Navigator (left sidebar), type:
users→ Select User Administration > Users. - Create three users:
- User1 (Customer)
Name: User ITS
Username: itsuser
Password: Generate and then save the password. Rename to Yeswecan!7.
Role: user - User2 (Service Desk Agent)
Name: Agent ITS
Username: itsagent
Password: Generate and then save the password. Rename to Yeswecan!7.
Role: itil - User3 (Service Desk Manager)
Name: Manager ITS
Username: itsmanager
Password: Generate and then save the password. Rename to Yeswecan!7.
Role: itil_admin - Make sure all users are Active.
- User1 (Customer)
Step 3: Log in as the Customer (ITS User)
- Open the Service Portal URL:
https://devXXXXX.service-now.com/sp. - Log in with ITS User’s username and password.
- From the homepage → click Submit Incident.
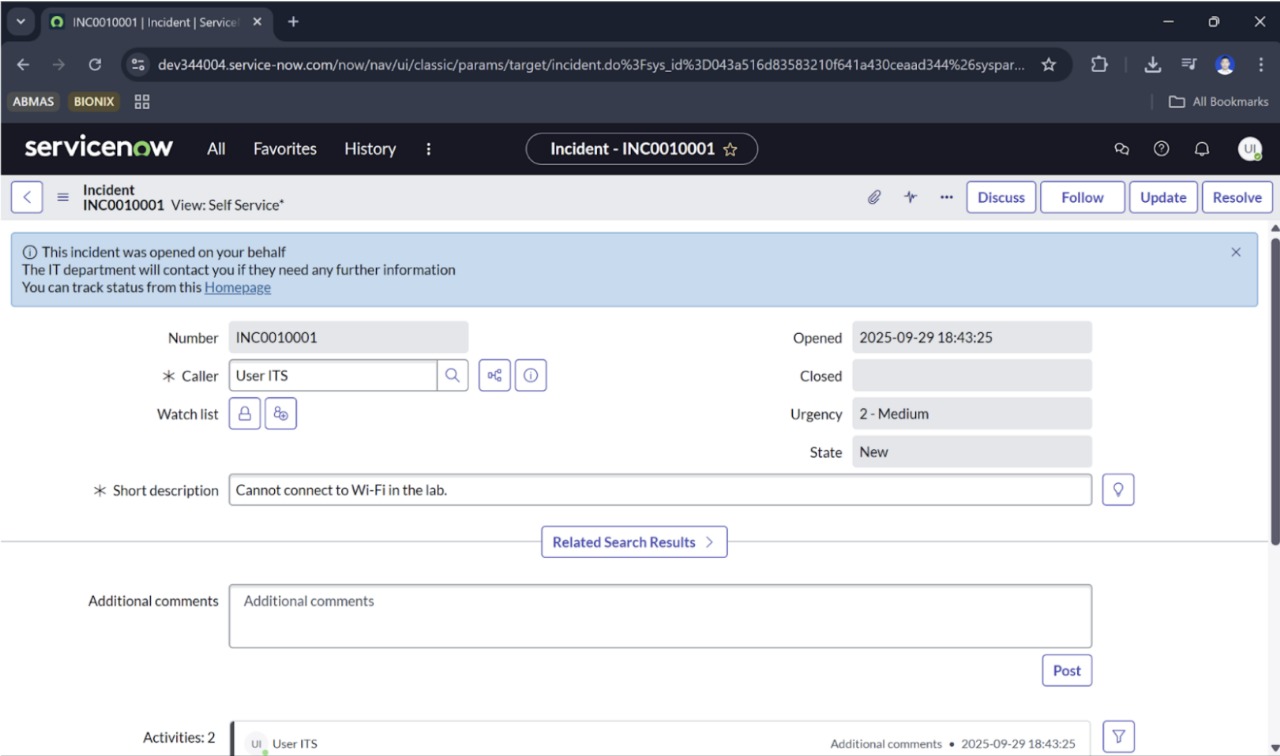
- Fill in:
- Short description: “Wi-Fi not working”
- Description: “Cannot connect to Wi-Fi in the lab.”
- Submit the Incident.
- Go to My Incidents to confirm the incident was created (status: New).
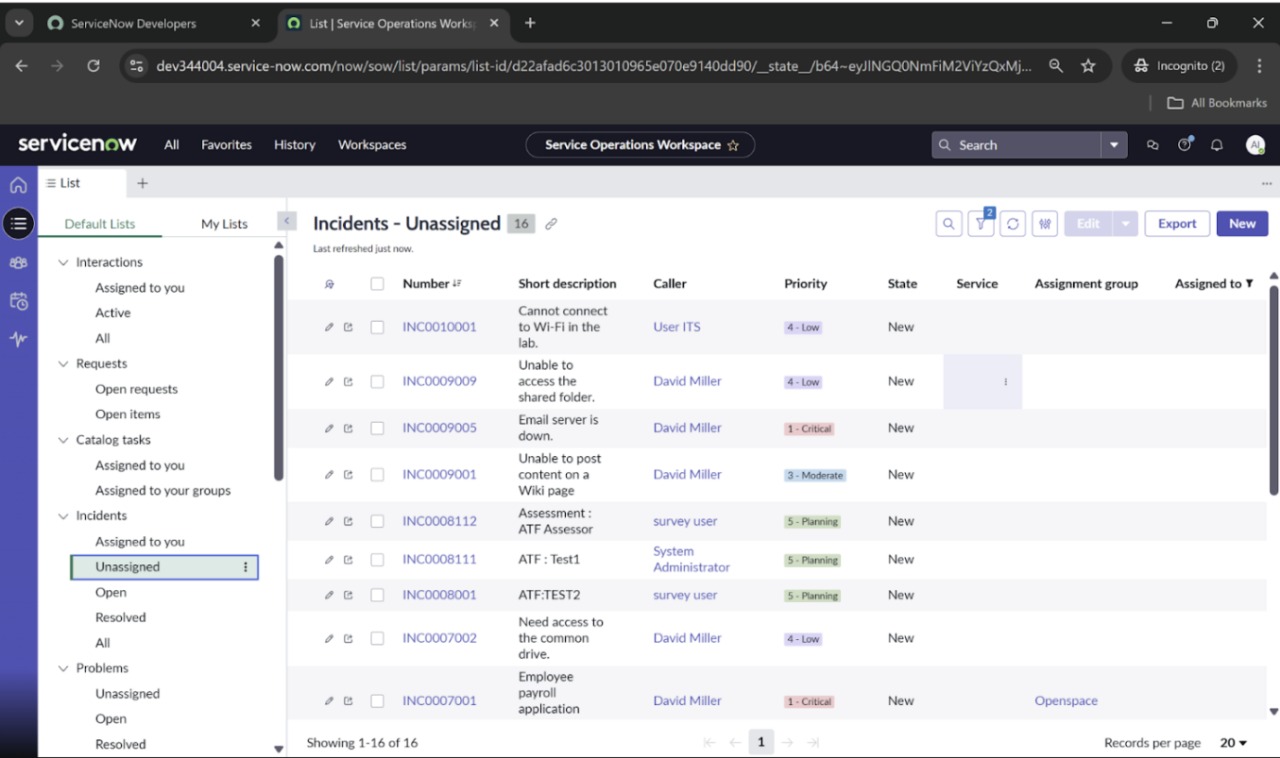
Step 4: Log in as the Service Desk Agent (ITS Agent)
- Open a new incognito tab.
- Log in with ITS Agent’s username and password.
- In the Application Navigator, search for incident.
- Go to Incidents > Open.
- Find the incident created by ITS User.
- Open the record and:
- Assign to yourself.
- Change State → In Progress.
- Add work notes.
- When finished, set State → Resolved.
- Save.
Step 5: Log back in as the Customer (ITS Agent)
- Log back into the Service Portal (
/sp). - Go to My Incidents.
- Observe that the incident now shows status Resolved.
- Close the ticket.
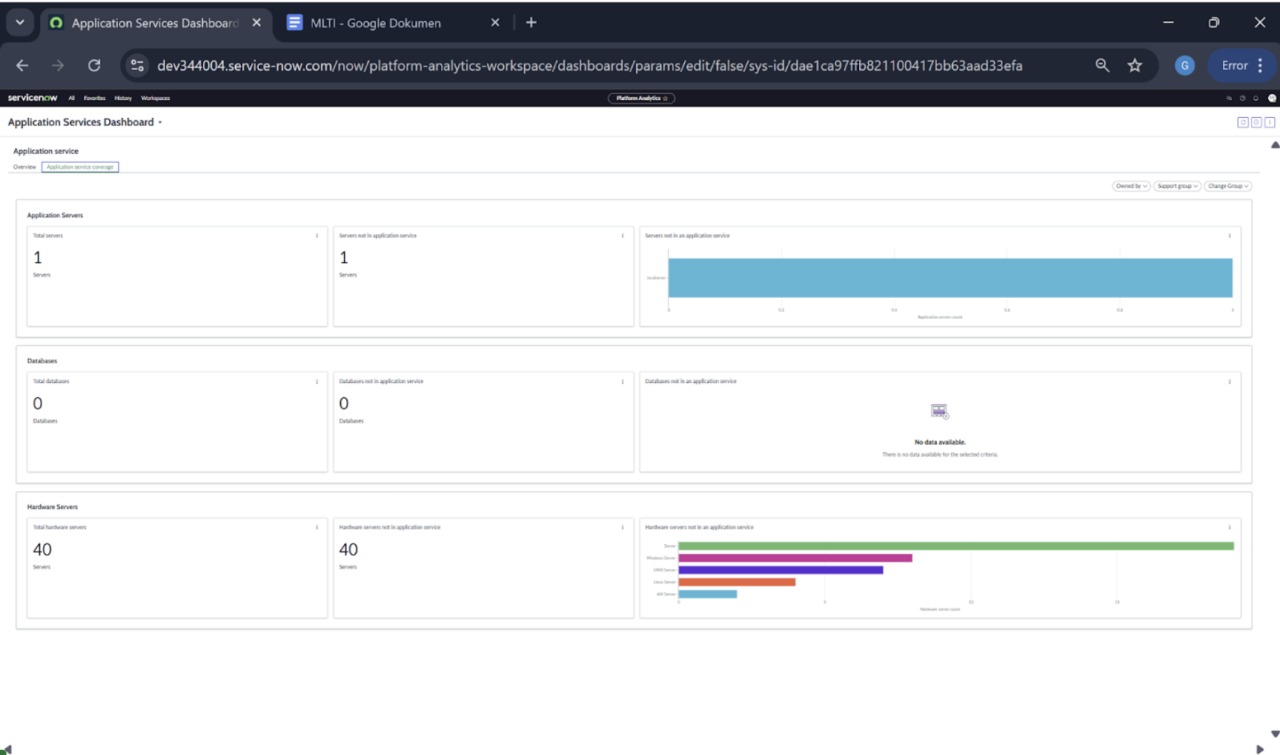
Step 6: Log in as the Manager (ITS Manager)
- Log in with ITS Manager’s credentials.
- In the Application Navigator, type incident.
- Explore:
- Incidents > All → See all tickets in the system.
- Reports > View / Run → Run incident reports.
- Dashboards → Monitor workload.
Example of an Incident Ticket:
Agent’s Dashboard:
Manager’s Dashboard:
Reflection
This week’s lab gave me hands-on experience in Incident Management using ServiceNow. By creating and simulating the roles of user, agent, and manager, I was able to see how ServiceNow streamlines the incident management process. The tool provides a structured approach to incident resolution and enables better communication and accountability among different roles.
The real-time dashboards were particularly helpful in monitoring incidents, ensuring they were resolved on time, and tracking performance indicators. I learned that a clear incident management process, with well-defined roles and responsibilities, is critical for minimizing downtime and maintaining business continuity.
Class Activity PDF
For a detailed breakdown of the activity, refer to the PDF Class Activity embedded below: